
I’ve had the Hobie Outback for a few months now, rigging has been steady, perhaps a little pedestrian. A times parts have been slow to arrive, a lot of time has been spent planning and there’s been fishing, Christmas, Easter and other holidays and weekends away in between.
I’ve rigged several kayaks before, mostly for other people. The Outback had to be capable of being fished in various guises, anchoring, fishing with live or deadbait, trolling, lure fishing and sailing. Obviously not all at once!, however, It needed to be rigged in such a way that would permit the role of the kayak to be changed quickly and with minimal fuss. Consideration was also given to safety and I decided early on that I’d be fitting a bilge pump. It’s something I’d always wanted to fit to my Big Game, though I never got around to doing it. With the Outback I had a plain canvas, and with several years of experience behind me, I wanted to get it right from day one.
The rigging is now effectively completed, sure, there’s a couple of minor changes that I’ll embody in time, though for all intents and purposes it’s finished and ready to tackle anything that I choose to throw at it.
Below are two photos, the first one shows the Outback as it was supplied, the one below that shows the rigging complete, but with the kayak fully stripped for storage/transport.

Hobie Outback (as supplied)

Hobie Outback (Fully rigged and stripped)
At a glance there’s not a lot of difference to be honest, though that kayak can now be rigged to sail and/or fish in a matter of minutes, day or night. Look closely and you’ll see various pieces of GearTrac, a couple of cleats and two rod holders (removable if required). Look a little closer and you’ll notice electrical cables, the kayak is fully wired to permit the connection of a battery to power up a fish finder, GPS, a bilge pump plus a navigation light.
There’s a crossbar fixed behind the seat, this permits the fitment of Hobie Sidekicks which are ideally suited to sailing or perhaps fishing in rough seas. There’s also an anchor trolley system fitted, a must for anchoring in tidal waters and anchoring duties in general. Also visible on the other side of the kayak, close to the nose is another trolley system. This is actually a half-trolley and was fitted to permit the use of a drogue whilst anchored.
With a few pointers you may notice that the rudder is larger than the standard item, having being upgraded to a ‘sailing rudder’. At the rear left of the kayak (behind a section of GearTrac) is a flush outlet for the bilge pump. So at a glance there’s not much change, however, there’s actually many hours of planning and rigging taken place to reach that point.
Rigging for ‘basic fishing duties’
Below there’s a few photos showing the rigging that I’d consider ideal for standard fishing duties, whether it be anchored up or drifting. This would perhaps permit some lure fishing, fishing with dead baits, perhaps a livebait if caught and used immediately.


The only additions have been my trusty dry box, a GoPro Hero 2 camera mounted up front on a PanFish Portrait. The PanFish is mounted to a piece of YakAttack’s GT90 GearTrac, another piece is mounted on the rear upper side of the dry box, the latter allowing the fitment of a VisiCarbon Pro flag/light and my camera monopod. The GoPro is remote controlled so it’s position up front is not a concern.

The GearTrac is strong and versatile, permitting the quick and easy fitment and removal of suitably equipped accessories as required. I also have four piece of GearTrac GT175 positioned around the kayak, more on that later.
There’s a anchor reel and anchor situated in the front hatch (in the Hobie hatch liner – not shown), though the dry box also features two anchor stowages, so there are various options for storing the anchor & reel. The kayak trolley is fitted upside down, located in the tank well scupper holes and secured using the forward straps on the dry box.


I fitted additional stainless steel pad eyes either side of the seat to permit the front securing straps of the dry box to be attached kayak. There are Hobie mounting points either side of the dry box though their positioning was unsuitable, however, they are perfect for securing the Hobie Livewell. As can be seen in the photos above, I’ve run two continuous lengths of bungee cord around the dry box to permit items to be easily stored, yet remaining readily available. I keep by removable cutting board and paddle float secured in these positions.
The cutting board is a must for bait fishing and was simple enough to manufacture. I utilised a MightyMount from YakAttack and associated T-bolt, thus allowing it be fitted and removed from the front right GearTrac in seconds.

Ok, I’ll take a closer look at the permanent fit as well as the electrical items.
The rod holders are modified composite RAM tubes. I’ve fitted them on either side of the seat in the recesses that permits the storage of pliers, etc, whilst fishing. They weren’t a straight forward fit and required spacers and a longer bolt for the handle to permit them to be correctly fitted. They’re ideally placed and provide an ‘armchair’ fishing position. Rod leashes are also attached in this location, keeping those expensive rods and reels leashed to the kayak at all times.

I found the centre 8” ‘Twist & Lock’ hatch not that user friendly to begin with. Like most hatches it opens up directly to the hull and does not permit the easy storage of tackle and other items. Hobie don’t produce a ‘hatch bag’ for the 8” hatch so after a some thought I produced my own hatch liner for little money. The end result was a cavernous compartment that allows many items of tackle, a flask, food, etc, to be stored as required.

There was of course the requirement (luxury) of having an electronics fit. I did consider a fish finder/GPS combo unit, though once you combine the initial purchase price with a mapping card they suddenly become very expensive. I already owned a Garmin 60Csx GPS with Bluecharts, so I decided to stick with that and to add a new fish finder. After an awful lot of deliberation I settled on a Lowrance Elite 4x DSI. This is a small down imaging unit and from the various reviews that I’d read, it’s performance (and price) were quite impressive.
The GPS was already mounted to a RAM cradle and could be fitted to the GearTrac in seconds. The Lowrance is supplied with a rather bulky mount, though for some additional expenditure a dedicated RAM mount can be purchased (part No.RAM-B-101-LO11). This negates the requirement for the supplied Lowrance mount and permits the unit to be mounted directly to the GearTrac using a ScrewBall from YakAttack. Both the fish finder and the GPS are easily removed and stored for surf landings if required.


The transducer for the DSI units should ideally be placed outside the hull, as opposed to a ‘shoot through hull’ configuration and generally used with traditional sonars. This did prove somewhat difficult on the Outback as the only suitable mounting points were the rear scupper holes. I didn’t want to lose the facility of using the Hobie kayak trolley so an alternative mounting point was required. I’m not a fan of mounting a transducer on an ‘arm’, hanging it over the side of the kayak, though after quite some though I worked out that by removing the thread from a seat scupper that the transducer would pass through. The transducer mount needed quite some modification, though the end result was neat, tidy and very functional.


I’ll cover the fish finder installation in a little more detail at a later date. I also took the opportunity to fit a an electric bilge pump to enable water to be quickly removed from the hull should I ever experience a leak whilst I’m afloat. Sure, it’s unlikely, but if it does happen I’ll certainly be happy that I took the time to fit the system.


The last electrical item that I fitted was a homemade navigation light. It’s nothing special, an off the shelf light unit, aluminium pole, foam grip and a waterproof plug. I modified the base, fitting a T-Bolt from YakAttack, thus allowing me to fit the light to a section of GearTrac. A mating waterproof socket was fitted to the hull and it was wired into the main electrical loom. The light is easily removed when afloat and can be stored for surf landings if required.
The main wiring loom was made in one piece and fully sealed to prevent corrosion and the ingress of moisture.


An anchor trolley was also required so I chose to fit the genuine Hobie trolley system. This came supplied with some quality components and was fitted in well under an hour. I modified the suggested routing a little to meet my own requirements. It’s a full length trolley, running from the bow to the stern, permitting the positioning of the anchor anywhere along the trolley run.


As mentioned earlier, on the right hand side of the kayak I fitted a ‘half trolley’, running fully forward from the centre of the kayak. This was fitted purely to permit the use of a drogue whilst at anchor. If you’re subjected to a cross wind whilst at anchor the kayak will tend to swing across the tide. This can be quite annoying and doesn’t provide the best fishing position. With a drogue deployed just ahead of the kayak, with the trolley fully forward, the kayak will (with some tide running) swing back into the tide. I use this method a lot and it works extremely well.

Rigging for live baiting
I’ve tried live baiting from a kayak in the past with some exciting moments a few good fish to show for it. I did make a DIY livewell, though I have never used it in anger, the opportunities just never presented themselves. What live baiting I did accomplish was a result of catching a suitable bait and dropping it straight back down on a hook. I recently acquired a Hobie Livewell which after some minor modifications (click on the link for the full article) is ready for use. Fitting the livewell is straight forward enough, it’s a case of attaching the uptake pipe, lowering the overflow pipe to the desired level and clipping it to the kayak.
The livewell comes with two straps as standard which I personally didn’t feel was enough. There’s also the issue that with the livewell fitted of where to store the kayak trolley. I added a removable bungee cord to two existing fitting behind the livewell and I use it as shown below.


This bungee can be used as an additional securing point and it can also be used to secure the kayak trolley whilst afloat. With the trolley axle positioned up against the flared ends of the rod tubes, the bungee cords pulls it hard into position and secures it tightly to the hull of the kayak.


The livewell is internally powered via a rechargeable SLA battery, therefore there’s no need to provide external power to this unit. The livewell sits low in the tank well and will ensure a stable configuration, especially when you take the stability of the Outback into consideration.
You can see in the above photos that the Outback has the centre bar fitted for the Sidekicks. This is a fixed bar and if you haven’t a livewell, and may like one in the future, I’d try and borrow one to permit accurate fitting of this crossbar. If it’s positioned too far back the Hobie livewell will not fit!, if it’s positioned too close to the seat back, the seat will foul it when reclined… just food for thought.
Rigging the Outback for livebait fishing is as simple as that. The existing composite RAM tubes that are fitted to either side of the seat are ideal for this type of fishing.

Rigging for trolling
This was considerably more challenging as I didn’t consider the RAM tubes ideal for trolling. They lock off well enough for bait fishing, etc, however, I wanted a solid rod holder for trolling. Another consideration was that I wanted the rods positioned slightly ahead of me, permitting easy viewing of the rods whilst peddling to enable the action of the lure to be closely monitored and well as watching for a bite. If you’re only fishing the one rod there’s no real reason why you can’t just hold onto it. That said, if the weather is particularly cold you may prefer to have your hands tucked into your PFD!.
I didn’t want to further modify the kayak from what I’d already planned so it was a case of working with what I had. I had previously given some thought to this problem before I’d bolted several lengths of GearTrac to the kayak. After looking through the YakAttack website I’d been intrigued to see a Scotty mount fitted to a length of GearTrac by using two MightyMounts and T-bolts.
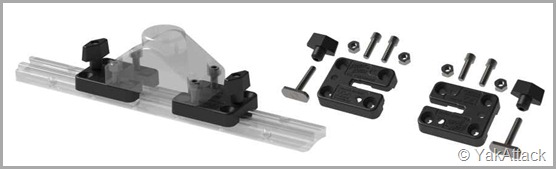
The Scotty Baitcaster rod holders are a solid affair and seemed ideal for trolling duties. However, after sitting in the kayak it soon became apparent that with the rod holders positioned either side of my knees that I’d be unable to pedal with the rods positioned at right angles to the kayak.

After a little more online research I came across the Scotty 254 vertical extenders. These effectively lifted the rod holders up by around 8-10” and eliminated the fouling issue whilst peddling. They can be fitted and removed in seconds, broken down into the base, extender and rod holder, then stored in the drybox ready for use.


The Lowrance fish finder is repositioned at the front of the right hand side GearTrac, whilst the GPS is repositioned on the left hand side. The GPS loses it’s external power supply in this position, though I’m not overly concerned as the internal batteries provides hours of use. The rods are easily reached from the sitting position, I just have to lean forward slightly to remove a rod. This configuration clearly allows two rods to be fished at the same time.
If you look closely at the right hand Scotty rod holder you can see blue and yellow ‘slip discs’ fitted. These are an optional extra from Scotty and permit an infinite range of locking positions through its range of movement. They also lock the rod holder very tightly in position, in fact they’re far more effective than I’d envisaged.
If you’ve already read Part 1 of ‘Rigging the Outback for fishing’ you should be seeing just how versatile the GearTrac system for YakAttack actually is. I’ve used it now for mounting my fish finder, GPS, rod holders, VisiCarbon pole, camera mounts (various), sailing pulleys and a navigation light!. The beauty is that everything is removable leaving only the low profile GearTracs fitted to the kayak.