As I talk to folks both new and experienced in the kayak fishing world, gear and kayak rigging bubbles up as a subject constantly. Having been in the kayak for more than 10 years now, I have rigged quite a few boats. I have done the “all in, all at once rigging” and then the “little bit at a time because it’s all I can afford” kayak rigging.
I don’t really have a preference. It’s more of a money thing. If I have the extra cash, more toys is more fun I guess.
What I wanted to do is give a break down of what, in my opinion, are the three phases of rigging. Not everyone does it this way but time and again, it’s what I see and what people share they are doing. You can skip phases, do them all at once, or whatever suits your fancy but if you are looking for a starting point, try Phase I. Progress as you see fit.
Table of Contents
TogglePHASE I
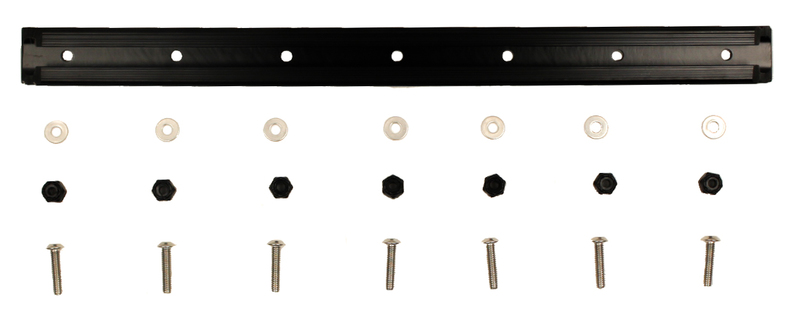
 Tracks– $10-$50- Some kayaks come with it already, some don’t. These are or at least can be the base for all attachments. These also allow you to strip off attachments before transport. I use the YakAttack GTSL 90 tracks. They come in all shapes, colors and sizes so finding one that fits your needs is fairly easy.
Adjustable Rod Holder– $20-$40- Flush mounted, molded in rod holders are great but typically mean you need leashes and there is only one angle to choose from. For a couple of years I have used the Zooka Tubes I bought at Mariner Sails in Dallas because they handle multiple reel types and lengths. It’s pretty solid unless you are trolling or catfishing for fish over 20 pounds. At that point you’ll want something more robust.
360 Degree Light– $40-$95- A must in many states from dusk until dawn, a 360 light lets other boaters know you are there, makes you legally compliant and gives you some light to see by should you need it. The Railblaza Visibility Kit II is my light. I’ve had the others and this is my favorite. It has easy to reach buttons, has an adjustable height, and is rigid so it won’t flex in high wind and wave scenarios. ACK has these in stock and shipping is fast. Click here to check them out.
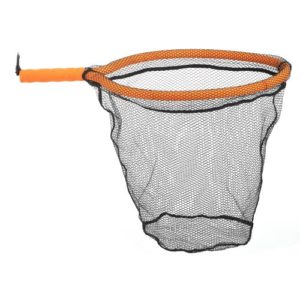
Net– $8-$125- Net styles vary as much as fishing pole choices now. The cream of the crop nets have yet to win my pocket book. I used my $10 Frabill net from Academy and sometimes regretted it. Not to long ago I purchased an EGO Slider Net and loved it but dang was it heavy and took up a lot of room. Now I am using an Everlast net from Academy. Bonus points because it floats.
Anchor– $0-$60- Depending on where you are going to be fishing, anchors have a variety of styles and weights. This is usually one of the first things people purchase who are going to be fishing in saltwater or big freshwater lakes. Some folks even make their own from an old barbell. Whether you are a bruce claw guy or not, an anchor is a quick way to stay on a spot.
Hawg Trough– $15-$25- The current go to measuring device for Catch Photograph and Release anglers and tourneys, a Hawg Trough should be up there on your list. Don’t forget the sharpie! Unless you want one that is pre-lined for you and floats. You can get that at Fishing Online. Click Here!
Cart– $20-$250- A cart isn’t really rigging as much as transport but really, a net isn’t rigging either. My absolute favorite cart is the C-TUG from Railblaza. It’s dang near bulletproof. I ran over it on accident with my truck and only some plastic in one of the wheels gave way. The rest of the cart? Completely usable. Slid on a new wheel and it’s as good as new. You can always build your own cart but unless your kayak has reinforced scuppers, avoid the scupper carts altogether.
PHASE II
12 Volt Battery– $20-$30- Lots of ways to do this one but the easiest and most common is a deer feeder battery. 12 volt 7.5Ah and rechargeable. Why do you need this? To power the next thing on the list!
Fish Finder– $60-$1500+- Dozens of options for this one. Get the best you can afford and upgrade as you want/need. I use a Humminbird 798 CIHDSI now. I started with a $90 Lowrance and worked my way up as I could rat hole some money away. The Lowrance I started with wasn’t tip top of the line. It wasn’t even color but I’m color blind anyway so yay for saving a few bucks!
Push Pole/Anchor Stick– $50-$100- These can be different or the same. If you fish frequently in water less than eight feet deep, this is a good way to go. I use the Park-N-Pole. I have the 12 foot version now, started with a six foot version.
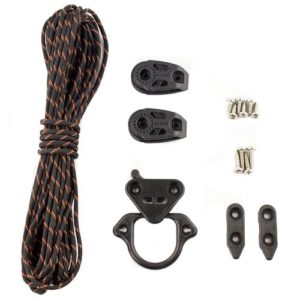
 Anchor Trolley– $20-$40- So why is this in Phase II and not with the anchor in Phase I? Lots of people simply clip or tie the anchor wherever they can. Not until later do folks discover the advantages of this device. You don’t need one to run an anchor but once you use it you will love it. I have the YakAttack HD Anchor Trolley but several companies make a good one. With a couple of pulleys and some paracord, crafty folks can make one for a few bucks.
Transducer Mount– Not everyone can or wants to do a through hull mount.Even fewer have a transducer ready boat. For those who like to hang the transducer off the side and remove when off the water, the options are few. I use the Mad Frog Liberator and it works well for my needs.
Gear Box/Milk Crate– $0-$125- If you like to pack lots of baits, you’ll need somewhere to put all of those boxes while still staying organized. For the DIYer, a milk crate is often used. I prefer a more rugged, UV protected, solid state box with a lid and attachable hardware with rod holders. For my money, The Black Pak is one of the best accessories I’ve ever purchased. When I am bank stomping or wanting to go simple, I have a Flambeau Tackle Bag that works really well too.
PHASE III
GPS– $100-$300- If not included in your fish finder, these devices can be helpful to mark those magic hotspots. If you don’t mind using your cell phone, you can download the Navionics app and do this for $15.
Video Camera– $50-$500- GoPro, WASP, Garmin, Sony and more are ready to capture your every single move. With a variety of mounts available the sky is the limit. I use a few different brands currently but really like the sound and video on my Sonys.
Silent Traction System– $75-$300- ConSeal or others like SeaDek and Marine Mat will use soft foam to add traction and muffle the sound of all your clanking around on the kayak. You want to maintain stealth, especially when fishing small or shallow waters.
Camera Pole– $30-$80- So you got a camera but need a unique way to get those cool angles. I use the PanFish mount from YakAttack and a couple of Dog Bones as well to mix up those shooting angles.
LED Lights– $30-$250- Whether it’s visibility or baitfish attraction, LED lights can be the ticket at night. You’ll want to do a little research and comparisons to make sure you get a durable product. Need some help? Check here. I prefer 5050 LEDs from Super Nova Fishing Lights.
VHF Radio– $65-$300- Depending on your destination, a VHF radio could be on your needs list. If you plan on going beyond the breakers, this should be in Phase I.
Cooler– $20-$500- Again, this is all about taste. How rugged does your cooler need to be? Do you like the popular brands? Yeti, Orion, K2, RTIC, Polar Bear and others offer a wide variety to choose from.
EPIRB/GPS Locator– $100-$700- Another BTB Phase I item, this can also be useful to help family know exactly where you are at.
Upgrades– Do you need a rudder? Maybe a Power Pole? Want to try out some Turbo Fins? How about a better seat? Usually these are some of the last things added though usually intended to do up front. Are they necessary? No. Do they make life on the water easier? Yes.
Keep in mind every person will prioritize differently but these would be the kayak rigging starting points I would recommend. Think it over, make a list, check your budget and then get after it!
8 thoughts on “Kayak Rigging and Accessories: Where Do I Start?”
Comments are closed.


Great thoughts as usual Chris. I have learned that the rigging bug can be a tremendous source of fun and creativity. Most folks probably rig for the necessities first, but one must actually learn what is necessary first. I came from bass boating so my perception of necessary is different from many if not most probably. Hope to see you again and maybe this time we can attack Lake Belton or one of your spots you trust me knowing.
We’ll definitely have to do that Bob! Let me know when you’re heading out this way. I’ll be in Tennessee for the KBF Open if you are making that trip.
Great info. I just got into kayak fishing. I’m looking for some lesson. Are u available or can recommend someone. I live in the WPB areas.
Chris, a great big “Thank you” from a yak nub. This is exactly what I was looking for! I just purchased a BG2, and I appreciate the insights and the links.
This looks really cool.Just getting into kayak fishing. that’s some useful information you shared. 😀
thanks for the post. I was looking for fishing from my new kayak. It’s a recreational one, and wanted to use for fishing too. your detail guide will help me to rig properly 🙂
Another good read!